KAUF Smart Bulb
Now Available: A15 and A19 bulb sizes!
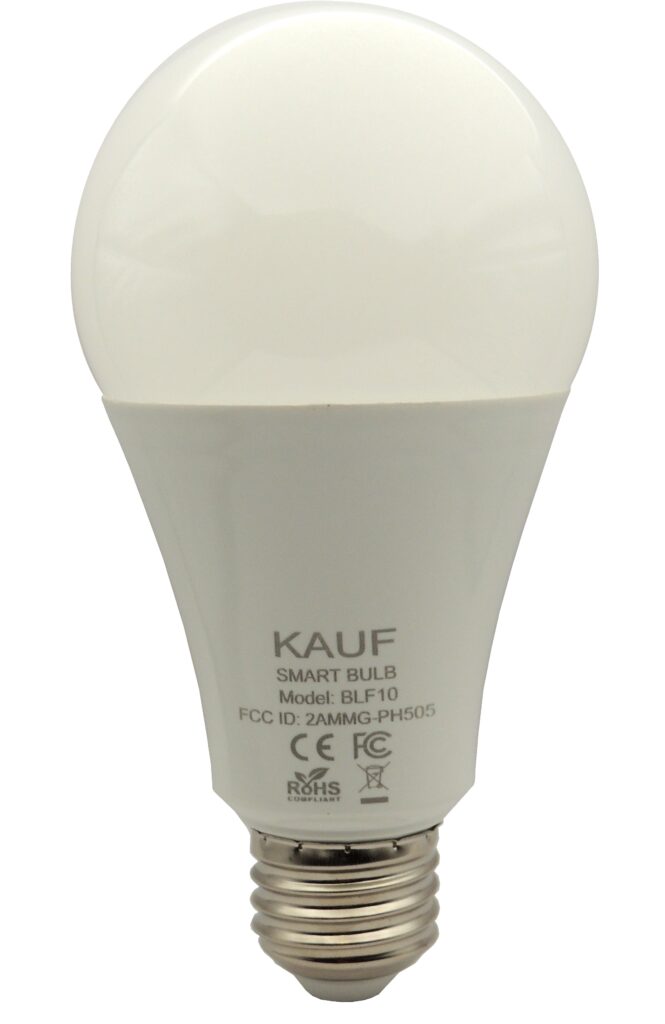
A21 Bulb

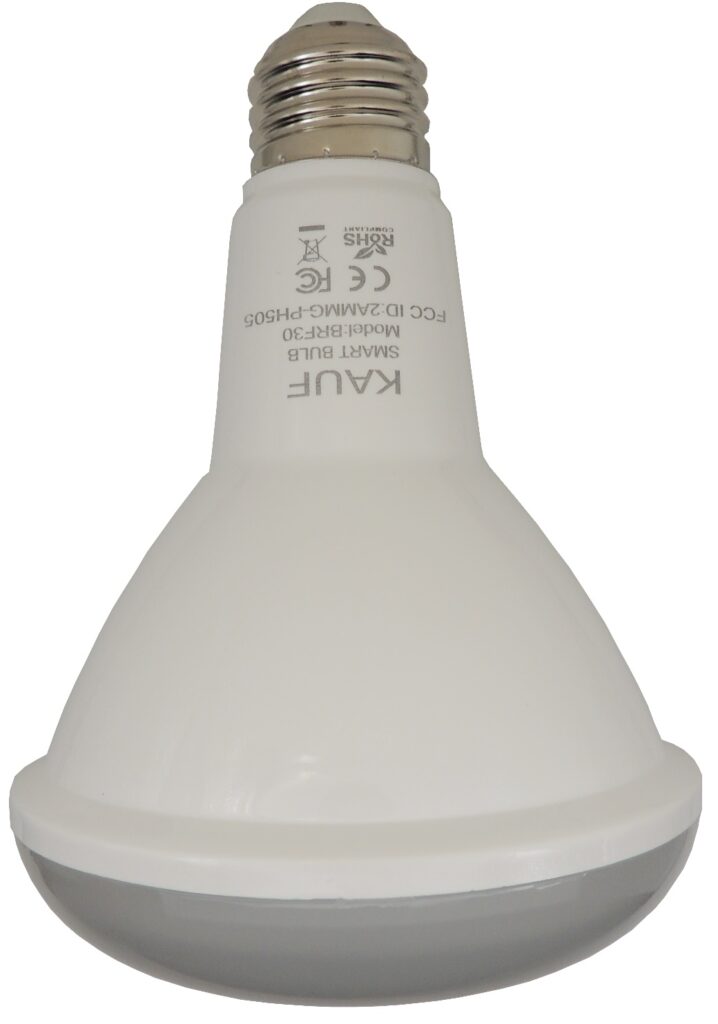
BR30 Bulb
Adding the KAUF Smart Bulb to Home Assistant
This video is about the KAUF Smart Plug, but the process is basically the same for the bulb. We recommend that you import the bulb into the ESPHome dashboard prior to adding to Home Assistant. See the video below under Importing to ESPHome Dashboard. You would follow the ESPHome dashboard import directions after connecting the bulb to WiFi and before adding to Home Assistant. This is step 4 in the written directions below, but not mentioned in the video.
The KAUF Smart Bulb comes programmed with a firmware that was made using ESPHome. The ESPHome firmware currently only works using Home Assistant as a hub. Home Assistant comes with a native API that is used to easily add and configure ESPHome based devices.
Please visit https://www.home-assistant.io/getting-started/ if you still need to get Home Assistant set up. The easiest way is to purchase a Raspberry Pi kit, flash the appropriate Home Assistant image onto an SD card, and then boot the Raspberry Pi from the SD card. Feel free to contact us if you still need further help.
Once you have Home Assistant running, complete the following steps to add a KAUF Smart Bulb.
Step 1: Plug in a KAUF Smart Bulb. The bulb will turn on white when power is first applied. This is done so that the bulb can be used with a normal wall switch if desired. This behavior can be modified by adding the bulb to your ESPHome dashboard using the below yaml file.
Step 2: Connect to the KAUF Smart Bulb’s Wi-Fi Hotspot. When a KAUF Smart Bulb is unable to connect to a Wi-Fi network, the bulb will wait 15 seconds and then create its own Wi-Fi hotspot. The Wi-Fi hotspot SSID will be “Kauf Bulb Hotspot”.
Step 3: Enter Wi-Fi credentials into the web interface. When you connect to the KAUF Smart Bulb’s hotspot, you should be prompted by your device to sign-in to the Wi-Fi network. The sign-in page will list Wi-Fi networks the KAUF Smart Bulb found, and allow entry of any SSID and password used to connect to your local Wi-Fi network. Enter your network credentials and click save. The KAUF Smart Bulb will reboot and connect to your Wi-Fi network.
Step 4 (Optional): Add the KAUF Smart Bulb in ESPHome Dashboard. The bulb should be automatically detected by the ESPHome dashboard if fully updated. From the ESPHome dashboard, the process is pretty self explanatory. We recommend that you change the name and set a friendly_name substitution in the yaml file. See the section below for a video walkthrough.
Step 5: Add the KAUF Smart Bulb in Home Assistant. Shortly after your KAUF Smart Bulb reboots, Home Assistant will give you a notification that a new device was discovered. Follow the notification to go to the Integrations page, and you will see the detected KAUF Smart Bulb in a blue box that says Discovered. Click the “Configure” button to complete setup.
Step 6: Rename the device and entities. If you didn’t add the bulb to the ESPHome dashboard and rename there, you will want to rename the device and any entities you intent to use in Home Assistant. From the Home Assistant Integrations page, accessed through the configuration menu, the KAUF Smart Bulb can now be found within the ESPHome card, initially named “Kauf Bulb”. Selecting the KAUF Smart Bulb from the list of ESPHome devices will allow you to rename the device to something more descriptive and useful. Follow the link that says “2 entities” to access a list of the available entities. The light entity will be the entity that is used to turn the KAUF Smart Bulb on and off and control brightness and color temperature. A text sensor entity provides the bulb’s IP address on your network. Clicking the individual entities will open up a window allowing the entity names and IDs to be changed to something more descriptive and useful.
Importing to ESPHome Dashboard
Version 1.72 implements ESPHome’s dashboard import feature, so if you update your bulbs they will be automatically detected by the ESPHome dashboard. The following video explains the process.
Downloads
All files for the KAUF RGBWW Smart Bulbs are stored at our kauf-rgbww-bulbs github repository.
To update via the web interface, use the latest bin.gz file on the releases page
DDP for WLED, xLights, etc.
Firmware version 1.7 adds DDP support so that the bulbs can be controlled by another device running WLED or xLights.
You should not try to flash a WLED bin or bin.gz firmware file onto these bulbs.
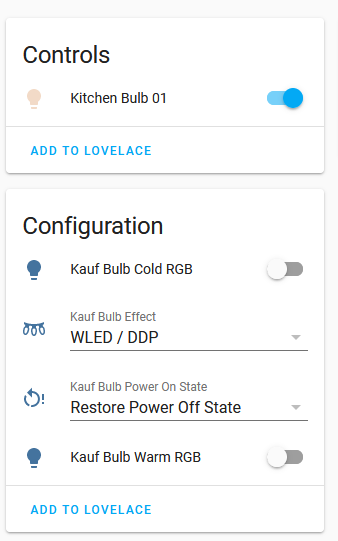
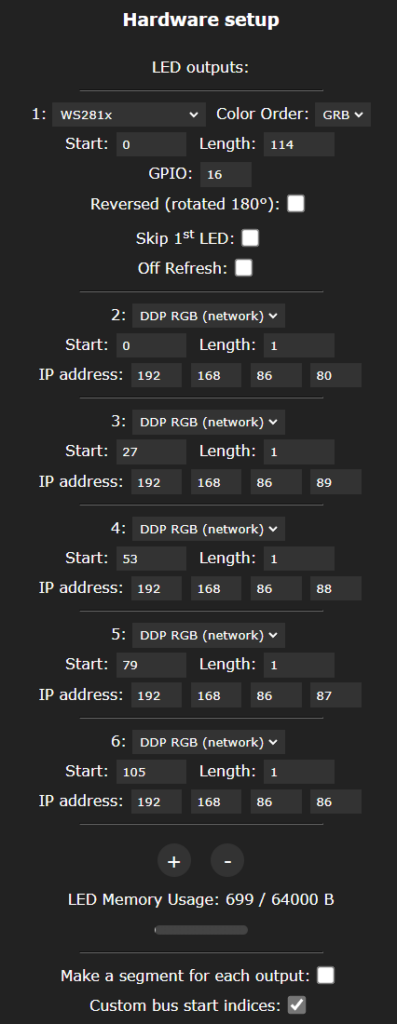
Once a bulb is updated to firmware version 1.7 or later, you will need to find the device in Home Assistant and there will be a “Kauf Bulb Effect” entity in the Configuration section as shown in the top-left picture below. Select “WLED / DDP” in the drop-down to enable DDP. This cannot be changed in the bulb’s web interface, only through Home Assistant.
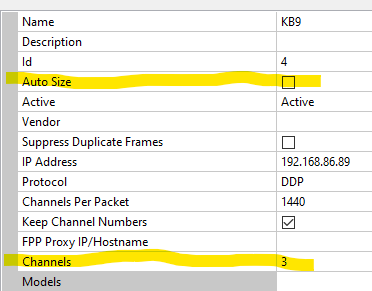
Once DDP is enabled as shown, the bulb will monitor the necessary UDP port for DDP packets and change color as instructed by any received DDP packets. Within WLED, you would configure DDP as in the below-right screenshot. You can see there is one string of LED lights physically connected to a GPIO pin of the WLED device and five bulbs connected by DDP. Make sure you enable “Custom bus start indices” to place the bulbs in the middle of an LED strip. For xLights, ensure that the controller configuration is for 3 channels as shown in the bottom-left screenshot below.
Chaining: As of update v1.863, the bulbs will now “chain” DDP packets. If a DDP packet has enough channel data for more than one bulb, the bulb will take the first three channels (R,G,B) for itself and send the remaining data to the next higher IP address.
Entity Information
The KAUF Smart Bulb will create several entities in Home Assistant.
Kauf Bulb (light) – The main light entity that controls the bulb’s light output. Can operate in two different color modes: RGB or Color Temperature.
Kauf Bulb Effect (select) – Allows selection of an effect for the bulb. Currently, the only available effect is “WLED / DDP”, which causes the bulb to listen over the network for DDP commands.
Kauf Bulb Power On State (select) – Allows configuration of bulb behavior when power is applied. Currently four options:
- Restore Power Off State: When power is applied, the bulb will return to whatever the bulb’s state was when power was lost.
- Always On – Last Value: When power is applied, the bulb will turn on to whatever the bulb’s state was last time the bulb was on.
- Always On – Bright White: When power is applied, the bulb will turn on to bright white.
- Always Off: Bulb will stay off when power is applied.
Kauf Bulb Default Fade (number) – Set the default fade length in milliseconds for changes to the bulb’s state. Default is 250ms. Any length can always be set by Home Assistant service calls, this number just sets the default.
Kauf Bulb Cold RGB (light, disabled by default) – An auxiliary light entity that controls the light output when the cold white LEDs are on in Color Temperature mode. RGB LEDs will be used to adjust the light output of the bulb’s cold white. The white level can be reduced to increase the RGB output relative to the cold white LED output.
Kauf Bulb Warm RGB (light, disabled by default) – An auxiliary light entity that controls the light output when the warm white LEDs are on in Color Temperature mode. RGB LEDs will be used to adjust the light output of the bulb’s warm white. The white level can be reduced to increase the RGB output relative to the warm white LED output.
Kauf Bulb Clear Wifi Credentials (button, disabled by default) – A button that will erase the saved WiFi credentials stored in the bulb’s flash memory and then restart the firmware so that the bulb’s WiFi AP will turn on.
Kauf Bulb IP Address (sensor, disabled by default) – Provides the bulb’s IP address.
Kauf Bulb Restart Firmware (button, disabled by default) – A button that restarts the firmware when pressed.
Kauf Bulb Uptime (sensor, disabled by default) – Gives the bulb’s uptime in seconds.
Kauf Bulb Max Power (number, disabled by default) – Max light power output as a percentage. Default is a maximum output of 80%, which gives a little bit extra headroom to make sure that bulbs aren’t as likely to malfunction in enclosed spaces.
Kauf Bulb No HASS (switch, disabled by default, was called HTTP Only in earlier firmware versions) – By default, the bulb will reboot itself every 15 minutes if a connection to Home Assistant can’t be established. This switch disables that function when turned on.
Kauf Bulb DDP Debug (select, disabled by default) – A select entity that allows selection of a debug level for DDP functionality. By default, no DDP packets are printed out to the logs. This select entity can be used to print either imperfect packets only or all packets that are received.
Hardware Information
The KAUF Smart Bulb includes an ESP8266 chip and uses the following pins:
- GPIO 4 – PWM signal for red LEDs.
- GPIO 12 – PWM Signal for green LEDs.
- GPIO 14 – PWM Signal for blue LEDs.
- GPIO 5 – PWM Signal for cold white LEDs.
- GPIO 13 – PWM Signal for warm white LEDs.
Flashing Tasmota
To convert the KAUF Smart Plug to Tasmota, simply download tasmota.bin.gz, browse to the plug’s IP address in a web browser, and use the web page to flash.
The recommended Tasmota template is:
{"NAME":"Kauf Bulb", "GPIO":[0,0,0,0,416,419,0,0,417,420,418,0,0,0], "FLAG":0, "BASE":18, "CMND":"SO105 1|RGBWWTable 204,204,122,153,153"}
Links and Other Info
digiblurDIY did a little write up of our smart bulb. Thanks!
Another write up from John’s Tech Blog. Awesome!
mostlychris made a nice video explaining a lot of the basics really well.
FiniteState designed a jig that can be 3d printed to manually flash our bulbs!